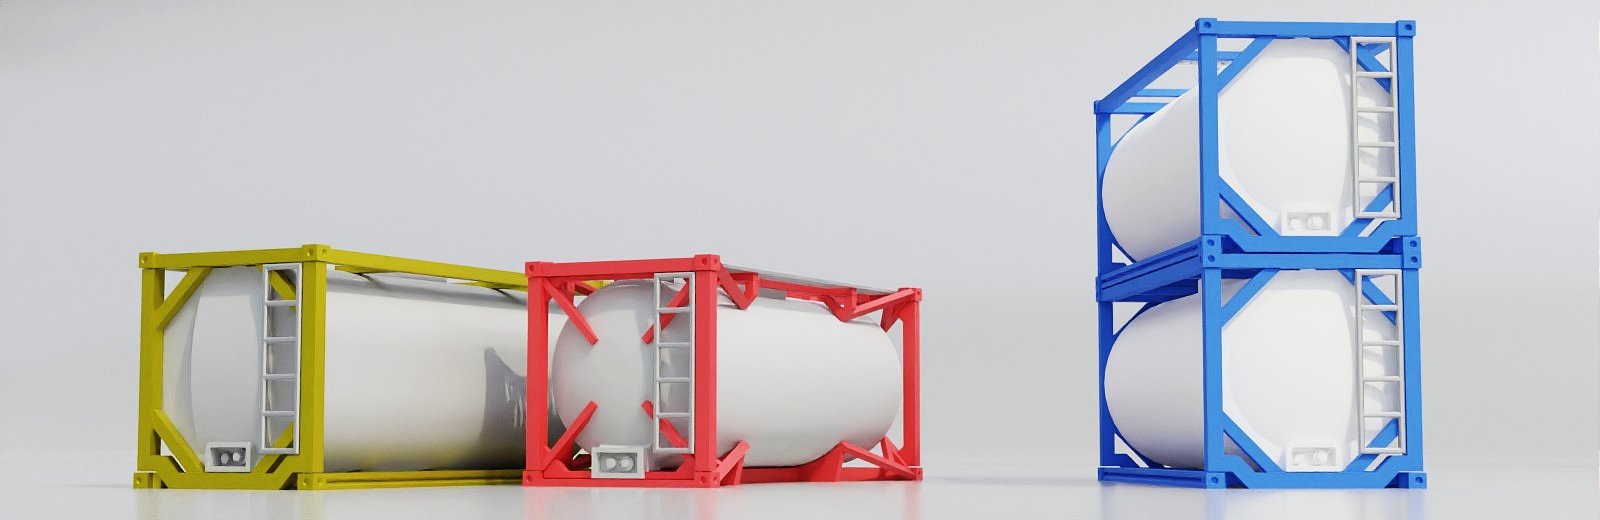
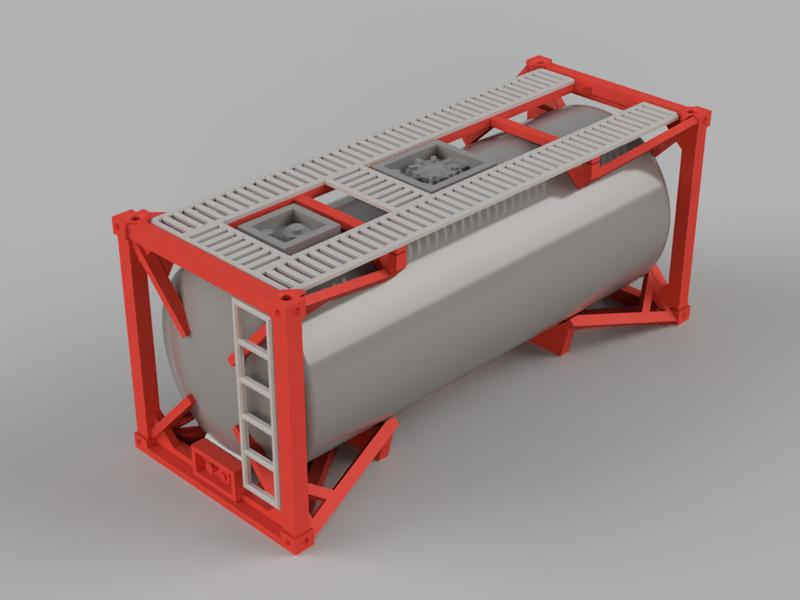
Tank containers collection
This project started back in 2018 when I started diving into railroad modelling and created the 1st model of tank container (after a normal ISO container). I did not print it then, and, since my experience with 3D printing was limited, now I understand that some things could be done better.
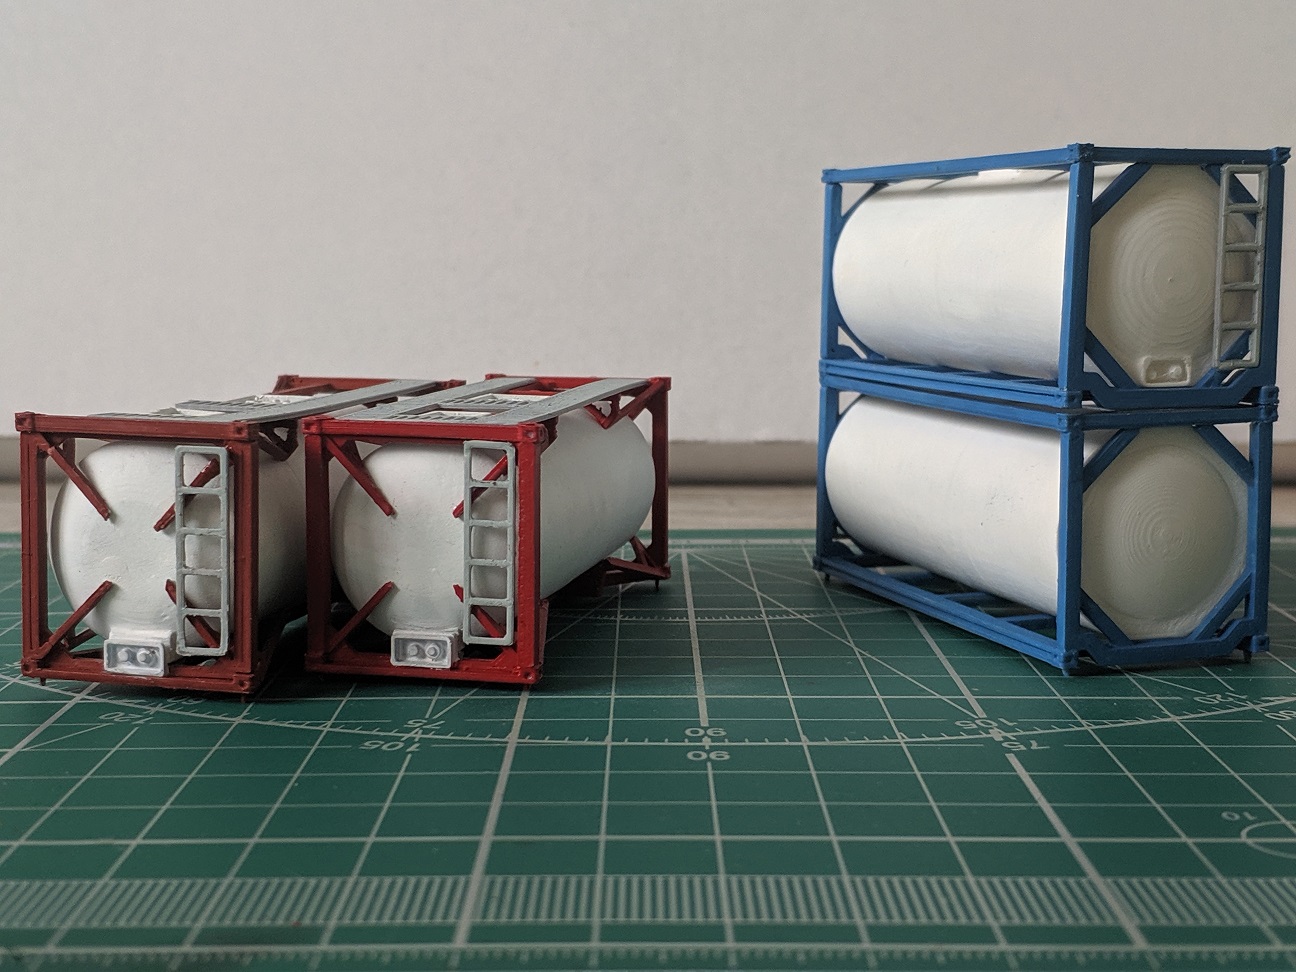
In August 2023 I redesigned the model into a collection of different tanks, so that if several of containers are put onto a layout, they do not look all the same.
The download files for the project are on Printables. Also mirrored on thingiverse and cults3d.
Old version of the project from 2018 can be found in a different project on printables, cults3d and on thingiverse, where old and new design share the same project.

|
The mounting holes/pins are compatible with PIKO H0 flatcars and my previous 20ft containers, but even better aligned. This time I decided to not create bottom pins with 3D printer, because 0.8mm pins are fragile, and not everyone needs them. Instead, there are holes both at top and bottom, and if you need the pins, you can melt in or glue pieces of paperclip or 0.8-1mm copper wire, or even thinner (0.5mm) if the wire is rigid enough, e.g. phosphor bronze wire or a guitar string. |
Details
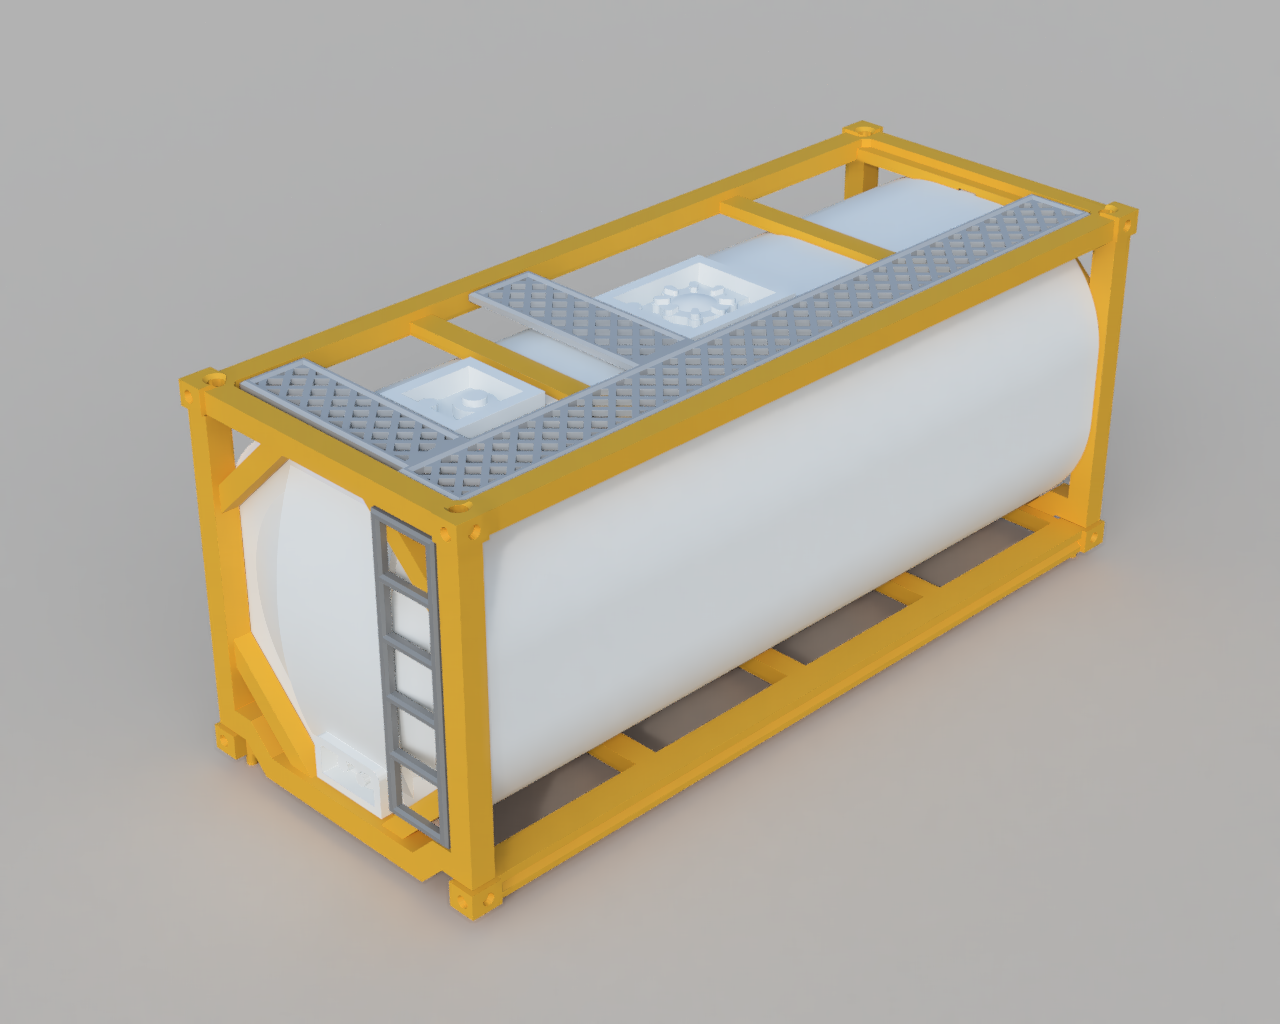
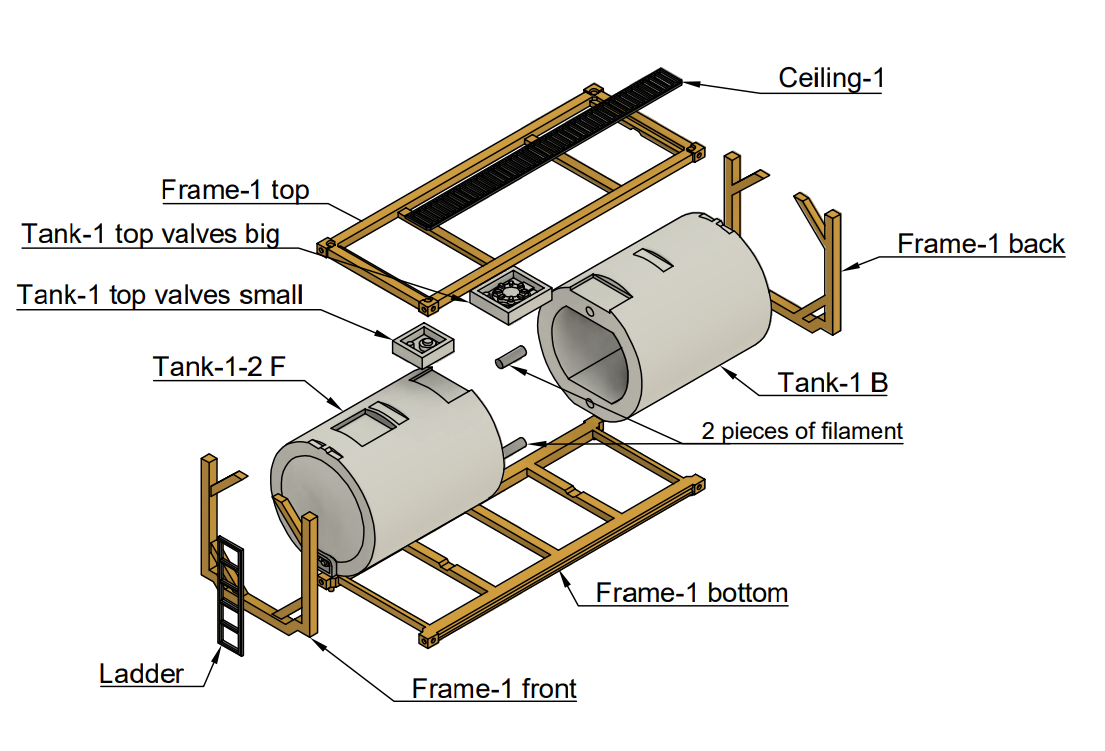
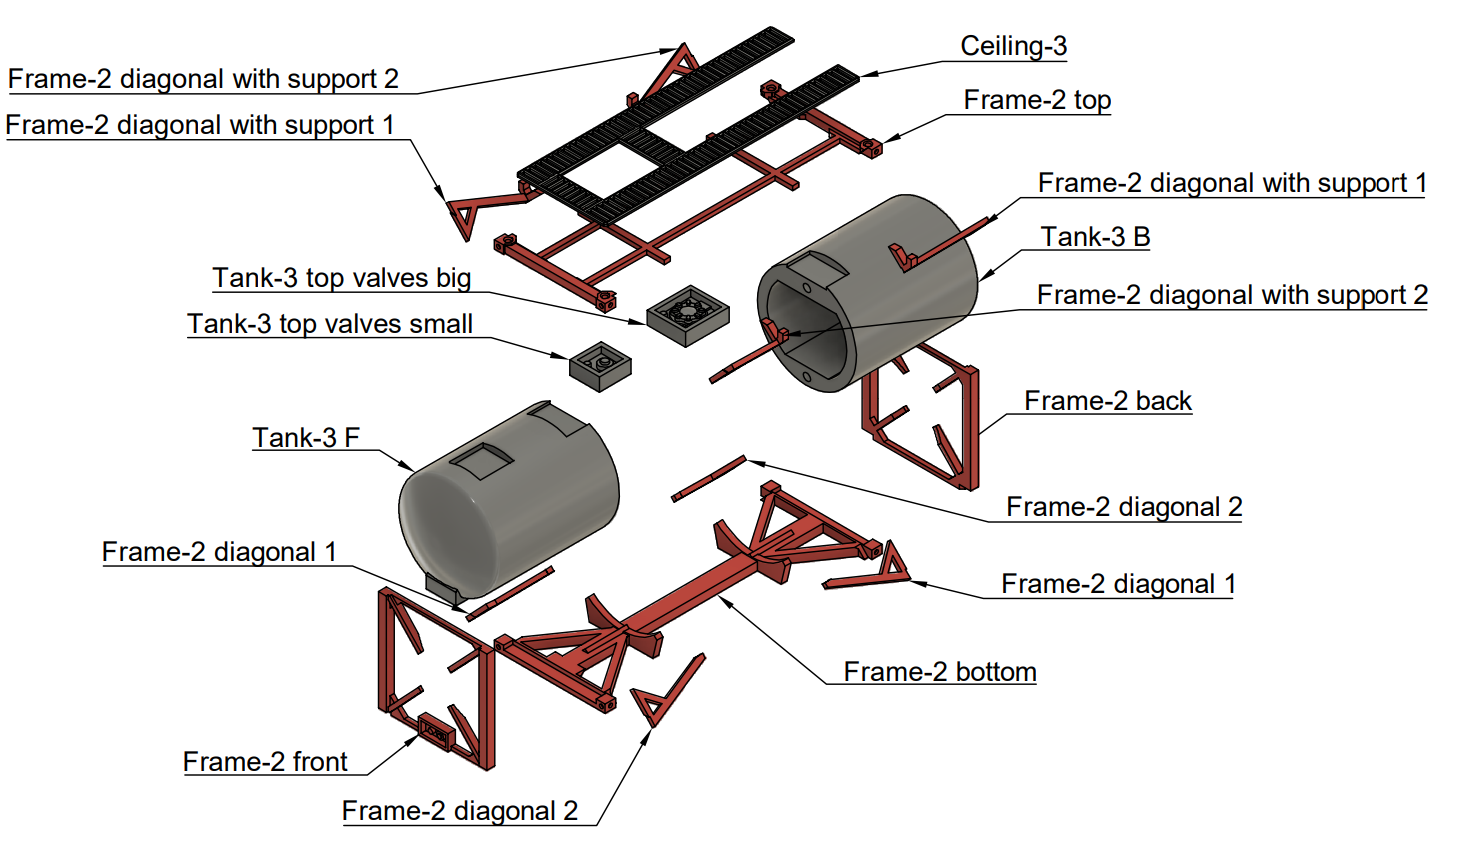
Here is a diagram of combination of parts that you can create.

Picture description in text:
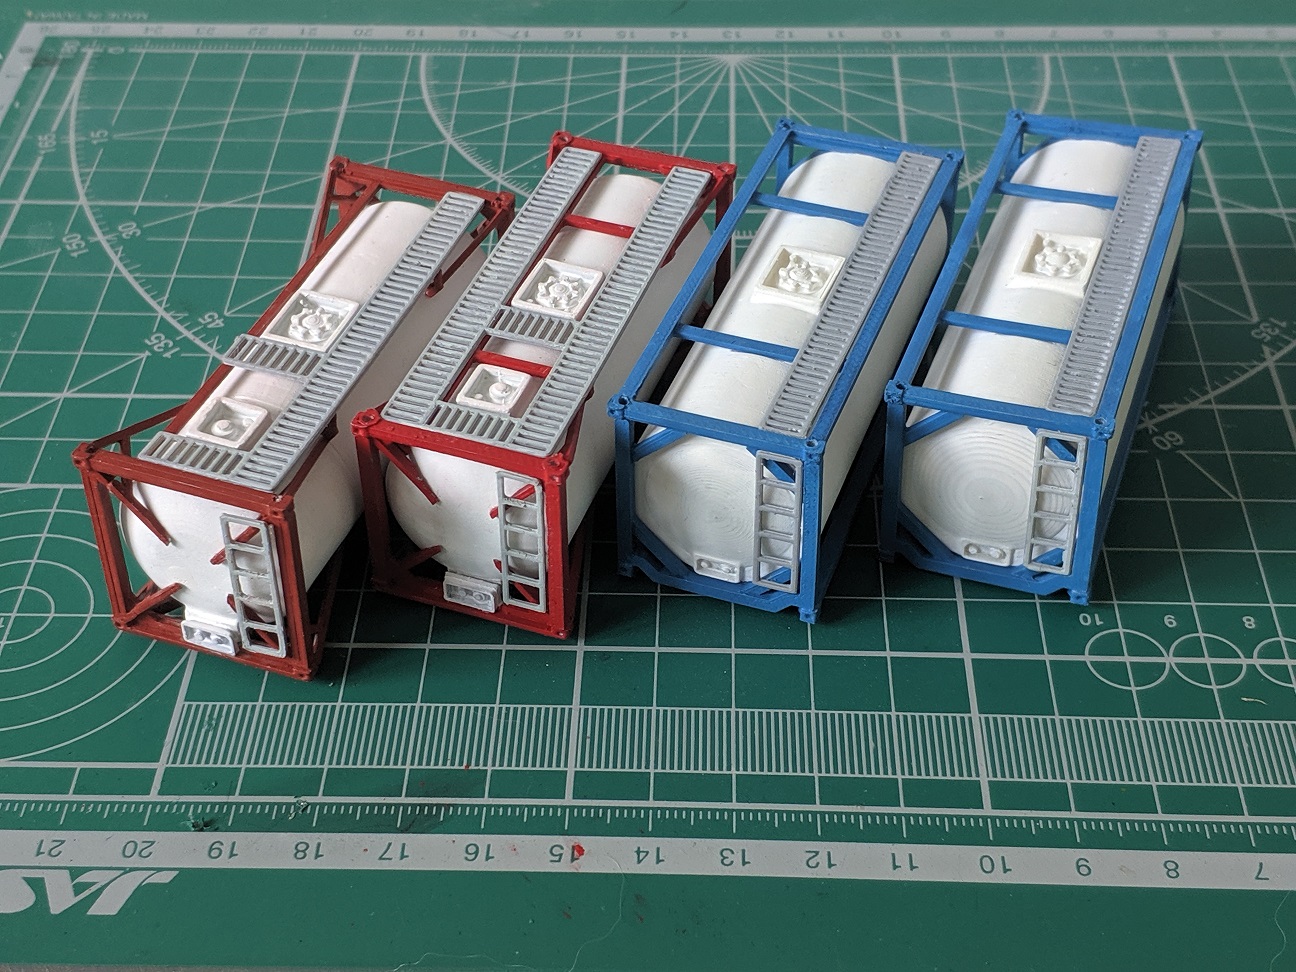
Basically there are 2 variants of frames: Frame-1 (yellow) is easy to print, Frame-2 (red) has more parts and is more complex to assemble.
Frame1 can have 2 kinds of tanks: Tank-1 (round in cross-section) and Tank-2 (round-rect in cross-section).
Tank1 is available in 2 variants — with 2 sets of valves at the top (Tank-1-2) and with 1 set (Tank-1-1).
Frame2 only has 1 tank variant, Tank-3. It has 2 sets top valves. Tank-3 is slightly smaller than others, so its valves are slightly taller and are stored as separate parts.
There is one option for side ladder and 3 options for top steps (Ceiling-1, Ceiling-2 and Ceiling-3). Ceiling-1 was designed to go with tanks with 1 set of valves, Ceiling-2 and Ceiling-3 go with 2 sets of top valves. But in general you can intermix them as you want.
Halves of tanks have holes for 1.75mm filament pieces for precise alignment. Tanks also have cutouts for alignment with frame pieces.
If you are going to lift the tanks by crane or want to add weight to wagons, it is a good idea to add around 10g of weight inside the tanks (steel nuts and bolts, lead weights, even stones or sand).
All the files have one flat face that should be at the bottom when printed. I used 0.08mm layer height for higher precision, 0.4mm standard nozzle. To speed things up, variable layer height can be used for tanks themselves (0.08mm for tank caps, 0.2mm for cylindrical sections)
Partlist
Here are example partlists for 2 variants of the containers.
-
Frames:
-
Frame-1 (yellow, simpler)
-
Frame-1 front
-
Frame-1 back
-
Frame-1 top
-
Frame-1 bottom
-
-
Frame-2 (red, complex)
-
Frame-2 front
-
Frame-2 back
-
Frame-2 top
-
Frame-2 bottom
-
Frame-2 diagonal 1 (x2)
-
Frame-2 diagonal 2 (x2)
-
Frame-2 diagonal with support 1 (x2)
-
Frame-2 diagonal with support 2 (x2)
-
-
-
Tanks:
-
Tank-1 (round)
-
Tank-1-2 (2 hatches at top)
-
Tank-1 B
-
Tank-1-2 F
-
Tank-1 top valves big
-
Tank-1 top valves small
-
-
Tank-1-1 (only 1 hatch at top)
-
Tank-1 B
-
Tank-1-1 F
-
Tank-1 top valves big
-
-
-
Tank-2 (round-rectangular)
-
Tank-2 F
-
Tank-2 B
-
Tank-1 top valves big
-
Tank-1 top valves small
-
-
Tank-3
-
Tank-3 B
-
Tank-3 F
-
Tank-3 top valves big
-
Tank-3 top valves small
-
-
-
Ladders and railings:
-
Ladder
-
Ceiling-1
-
Ceiling-2
-
Ceiling-3
-


